ChatGPT, Wardley and Go
In this article, I explain:
- how to create a ChatGPT plugin with Go
- how to validate the configuration with CUE
- how to create a basic API usable with ChatGPT
- how to display SVG images within chatGPT (more a do and don’t)
Introduction
I use ChatGPT on a daily basis as an assistant, not as a dictionary or an encyclopedia. I seek solutions to problems and am aware that I will find them myself. The role of ChatGPT is to assist me and help the solutions emerge from my mind. I ask questions, and with its knowledge, it shapes the way I think to converge towards the solutions.
For most strategic problems, I use the tools and techniques from Wardley Mapping, including:
- The value chain (with user needs on top and a few other doctrine principles)
- The evolution theory
- The climatic patterns
Building a map has value, and the challenge of positioning the various components on the map itself brings a lot of value.
While ChatGPT is not aware of the spatial representation, it can provide rationales about the placement. However, as a human, a visual representation is very helpful.
Therefore, as a geek, I started thinking about a plugin that would enable ChatGPT to draw a map.
In a previous article, I introduced wardleyToGo, an SDK for building Wardley Maps using Go code. As a ChatGPT subscriber, I can write a plugin for GPT-4.
This article is a journey that explains how I built a plugin to draw my maps, how it works, what I discovered, and more.
You may want to read this article if:
- You are a curious Wardley Mapper.
- You are a ChatGPT user and want to be aware of the upcoming possibilities.
- You are a Go developer and want to be familiar with the plumbing required to create a plugin for ChatGPT."
How a plugin works
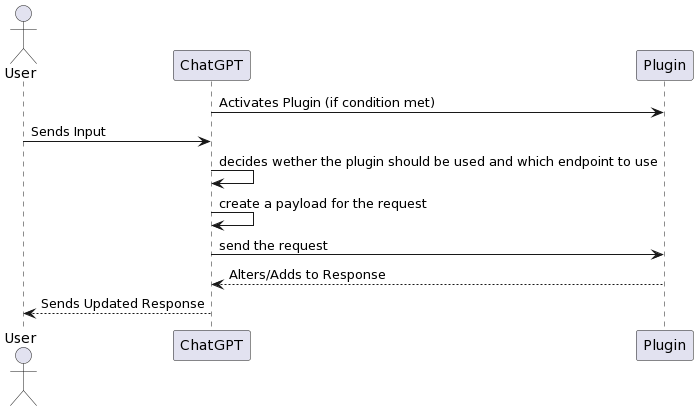
The development of plugins for ChatGPT is documented here In a glimpse, a plugin is a REST API that is called by ChatGPT.
To turn an API into a plugin, you must provide two files:
- a plugin manifest file served at
/.well-known/ai-plugin.json - the openAPI spec served through a path specified in the
ai-plugin.jsonfile.
The format of the manifest is important because, besides the serialization in JSON, the format is constrained.
For example, the field name_for_model must not have any space and should be limited to 50 character max.
Golang plumbing
In this section, I describe the plumbing I used in the Go file to create the plugin. This section is unrelated to the main feature and can probably be used for any Golang plugin.
Disclaimer: You may need to be familiar with the concepts of web handlers and how Go works to benefit from this section.
I am currently in the “make it work” phase, so all the code resides in the main package of a file. To make it easier to tweak the code, I created two separate handlers:
- One for the plumbing, which serves the manifest, the spec, the root, and the logo.
- One for the API itself.
The plumbing is managed through the ChatGPTPlumbing structure, which implements the http/handler.
This structure reads and generates the content of the manifest and the OpenAPI upon creation and caches it internally.
In this section, I describe the plumbing I used in the Go file to create the plugin. This section is unrelated to the main feature and can probably be used for any golang plugin.
type ChatGPTPlumbing struct {
 aiPlugin        *AIPlugin
 aiPluginPayload []byte
 openAPIFile     string
 openAPIContent  []byte
}

// ChatGPTPlumbing implements the http/handler interface
func (chatgptplumbing *ChatGPTPlumbing) ServeHTTP(w http.ResponseWriter, r *http.Request) {
 mux := http.NewServeMux()
 mux.HandleFunc("/.well-known/ai-plugin.json", func(w http.ResponseWriter, _ *http.Request) { // ...
 mux.HandleFunc("/openapi.yaml", func(w http.ResponseWriter, _ *http.Request) { // ...
 mux.HandleFunc("/logo.png", func(w http.ResponseWriter, _ *http.Request) { // ...
 mux.ServeHTTP(w, r)
}
The plumbing is created inside the main function and registered to handle the requests located at /
plumbing, _ := NewChatGPTPlumbing(aiPlugin)
mux := http.NewServeMux()
mux.Handle("/", plumbing)
The manifest and the OpenAPI are read (and validated) upon the creation of the plugin and cached within the structure.
Create and validate the aiplugin.json
The manifest needs to be instantiated at runtime to set the correct listening port and address. I created a Golang structure to handle the content and used the json package to serialize it.
Additionally, as mentioned earlier, the aiplugin.json has strict constraints. Since I’m currently in the “make it work” phase and frequently changing the content for testing purposes, it’s best for me to validate the plugin constraints each time I start the plugin.
To achieve this, I rely on the CUE language. I created a simple constraint file that I combine with a configuration file during startup to generate the content of the API.
- constraints.cue
Host: string | *"AUTO"

#AIPlugin: {
 // SchemaVersion Manifest schema version - required - v1
 schema_version: string & "v1"

 // NameForHuman Human-readable name, such as the full company name. 20 character max. - required
 name_for_human: string & =~"^.{1,20}$"

 // NameForModel Name the model will use to target the plugin (no spaces allowed, only letters and numbers). 50 character max. - required
 name_for_model: string & =~"^[a-zA-Z0-9]{1,50}$"

 // DescriptionForHuman Human-readable description of the plugin. 100 character max.
 description_for_human: string & =~"^.{1,100}$"

 // DescriptionForModel Description better tailored to the model, such as token context length considerations or keyword usage for improved plugin prompting. 8,000 character max. - required
 description_for_model: string & =~"^.{20,1000}$"
 auth:                  #Auth
 api:                   #API
 logo_url:              string | *"\(Host)/logo.png"
 contact_email:         string & =~"^.*@.*$"
 legal_info_url:        string | *"\(Host)/legal"
}

#Auth: {
 type: string | *"none"
}

#API: {
 type:                  string | *"openapi"
 url:                   string | *"\(Host)/openapi.yaml"
 is_user_authenticated: bool | *false
}- configuration.cue
configuration: #AIPlugin & {
 name_for_human:        "Wardley To Go"
 name_for_model:        "WardleyToGo"
 description_for_human: "This plugin draw Wardley Maps"
 description_for_model: "This plugin draw Wardley Maps"
 contact_email:         "me@address.com"
}
The Host is completed at runtime, and everything is combined to generate the go structure that is then serialized:
host := `Host: "` + address + `"`
constraints, err := ioutil.ReadFile("constraints.cue")
configuration, err := ioutil.ReadFile("wellknown.cue")
content := append(constraints, configuration...)
content = append([]byte(host+"\n"), content...)
ctx := cuecontext.New()
v := ctx.CompileBytes(content)
v = v.Lookup("configuration")
var aiplugin AIPlugin
err = v.Decode(&aiplugin)
Create and serve the OpenAPI
The OpenAPI needs to be tweaked as well to set the corresponding description and servers.
-
OpenAPI.yaml: The easy way The first attempt to build a versatile
openai.yamlfile was to create a golang template and parse it at runtime. The problem is that seting some templates into YAML leads to the YAML nightmare… So I used a more fun and geeky way. -
The Geeky way I am now generating the openapi.json with CUE as well. This provides two benefits:
- I do not have to write the spec in OpenAPI format (meaning I don’t need to fight with yaml or JSON)
- I can validate the payload sent by ChatGPT.
The code needs some more tests, but will eventually land in the repository.
Network plumbing and configuration
As usual, the configuration is handled through environment variables.
It allows to set the listening port and address.
I also implemented the tunneling with ngrok-go which gives me the opportunity to test the plugin on a remote host.
Side note: The CORS: I created a very simple “middleware” to handle CORS preflight requests:
Beside the allowed origins https://chat.openai.com and http://serveraddress:port, those headers are required:
w.Header().Set("Access-Control-Allow-Origin", origin)
w.Header().Set("Access-Control-Allow-Methods", "GET, POST, PUT, DELETE")
w.Header().Set("Access-Control-Allow-Headers", "Content-Type, Authorization, openai-conversation-id, openai-ephemeral-user-id, openai-*, sentry-trace, baggage")
Designing the API
Now that we have all the plumbing to make a REST API compatible with ChatGPT, let’s design the API.
The first simple goal is to be able to display the evolution axis and place let ChatGPT place a component on it.
So we will create an endpoint /mapEvolution; It will handle a POST request with a specific payload.
Creating a basic endpoint to display evolution axis
To generate a simple evolution SVG with a single component on it from the code (and with the wardleyToGo sdk), what I need is:
- the component name
- the component position on a 0x100 scale
This will constitutes the payload of the request to the /mapEvolution enpoint.
The design of the API documentation is essentialm because ChatGPT basically “read the doc” and generate a payload by itself. Therefore I must guide ChatGPT and explain him how the evolution axis works:
component:
  type: string
  description: The component to add to the map
evolution:
  type: int
  description: |
    The position on the evolution axis between 0 and 100.
    From 0 to 17 the compoenent is in stage 1 (genesis for an asset or a an activity, novel for a practice, concept for some general knowledge)
    From 18 to 40 the component is in stage 2 (custom for an asset or an activity, emerging for a practice, hypothesis for some general knowledge)
    From 40 to 70 the component is in stage 3 (product for and asset or an activity, good for a practice, or theory for some general knowledge)
    From 70 to 99 the component is in stage 4 (commodity for an asset of an activity, best for a practice, accepted for some general knwoledge)
The corresponding Go structure is
type EvolutionInput struct {
 Component string   `json:"component"`
 Evolution int      `json:"evolution"`
}
I won’t detail the implementation of the http handler as it is standard Go development.
Within the handler, I create a wardleyToGo.Map structure, fill the map with a wardley.Component.
Then create a SVG encoder on the http.ResponseWriter to send the result back to the ChatGPT UI.
Testing the plugin
Once I have started my server, I can try the plugin:
- installing he development version
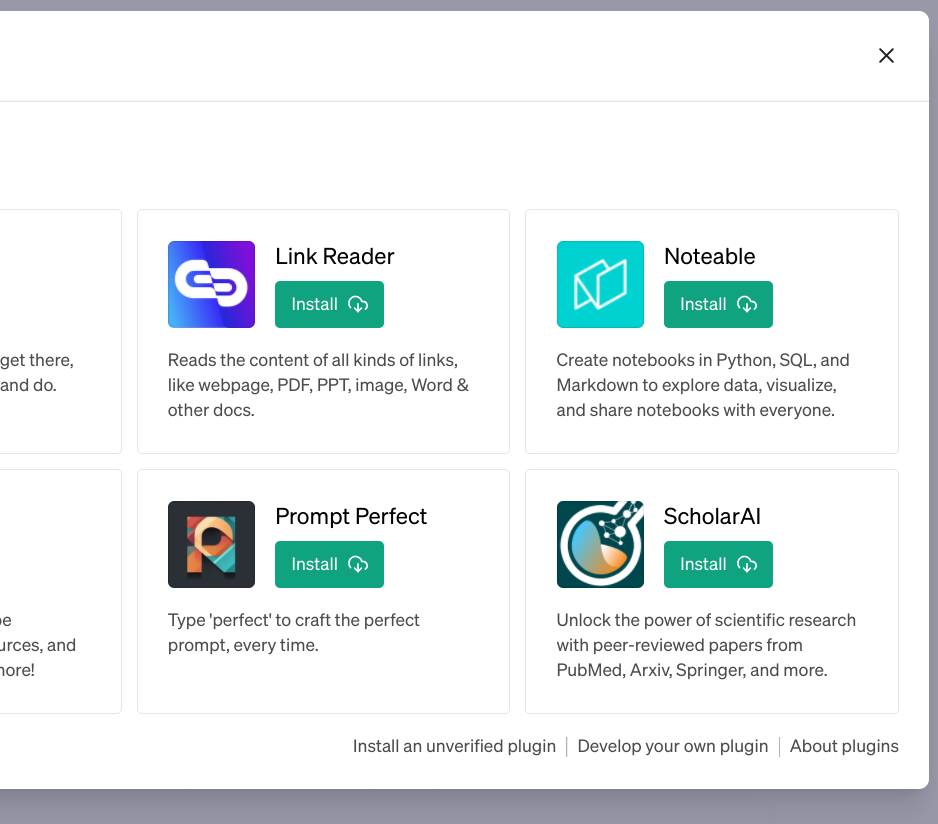
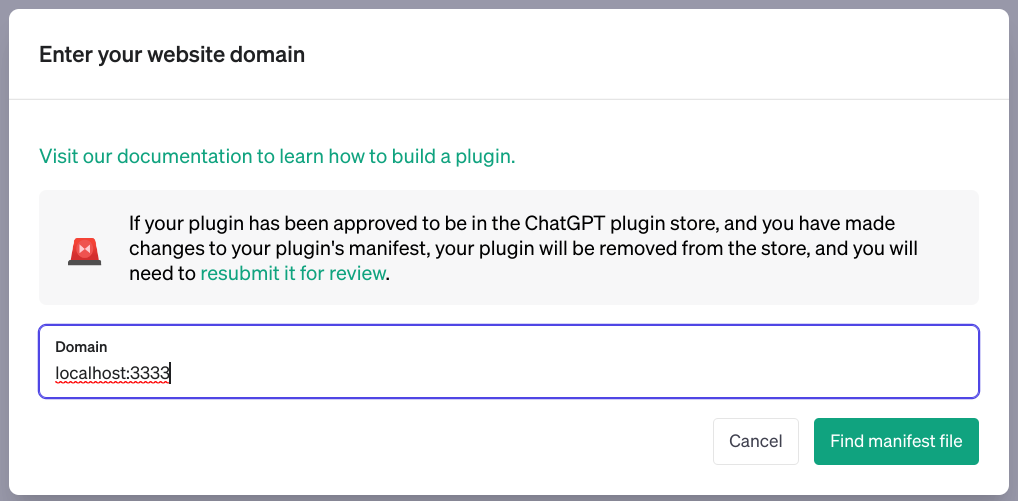
- sending the first request:
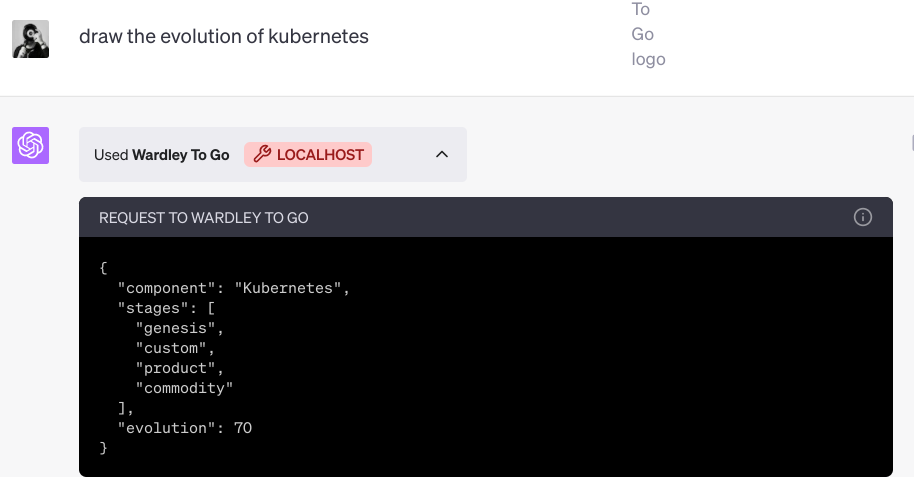
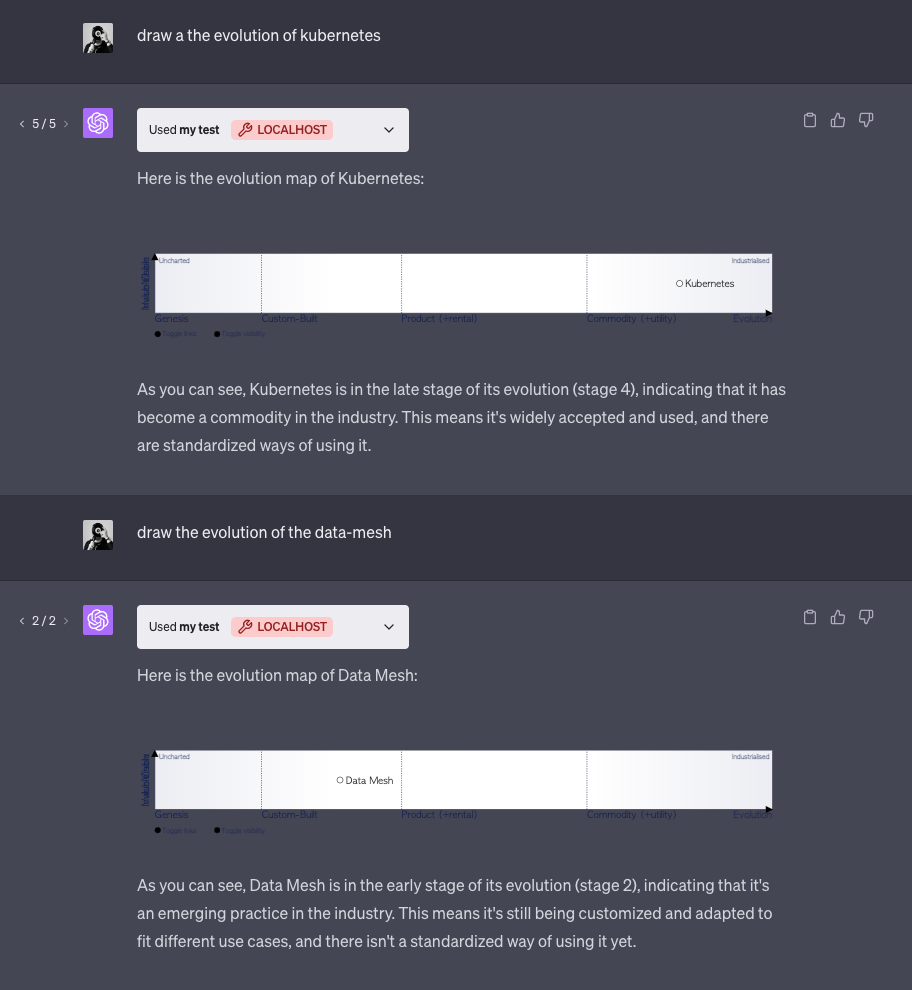
We see that the GPT-4 engine understood the request and had:
- evaluated the position of kubernetes according to its knowledge
- generated a payload according to the API
- used the description to place the evolution on the 0..100 scale
The plugin has received the request, has generated the map and sent the result:
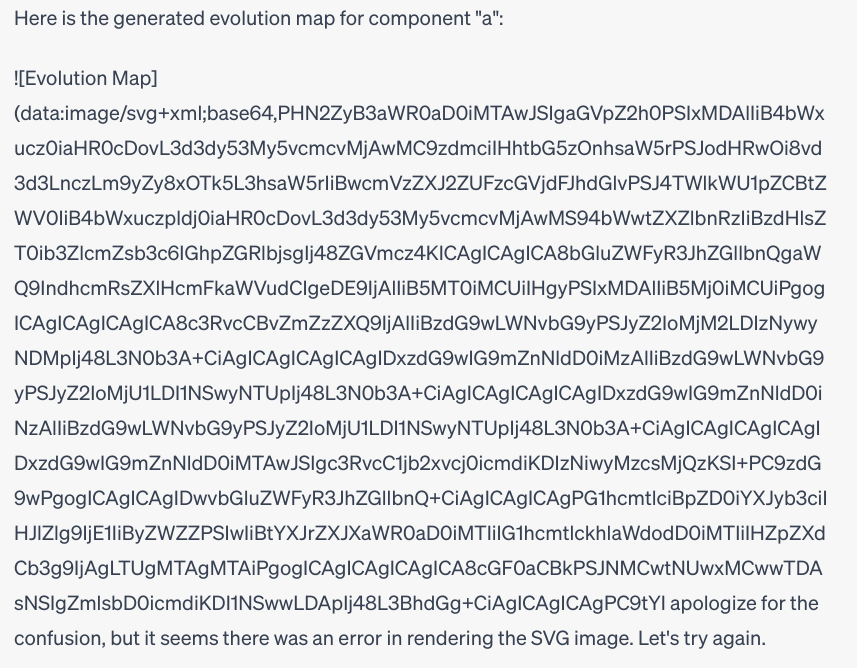
The problem is that the engine tries to analyze the reply and to format it as a markdown content. Here is the interpretation:
Here is the generated evolution map for kubernetes:
Which is then displayed correctly in the browser.
What I did for now, it that I generate and save the map internally and it suits my own need. The problem is that I cannot publish the plugin because I would be able to see all the maps generated by all the users of the plugin.
Note: This is another lesson from the plugin journey: plugins can be a real security issue. When you use a plugin, you consent to share information with third parties.
For testing purpose, I have developed an in-memory storage. The problem of this ephemeral storage is that when I want to consult an old chat, it tries to reload the old images which ends in a 404 error. Therefore, I also instantiated a simple on-disk storage that save all the maps I have generated.
Conclusion
So far, I reached my goald and I can now use ChatGPT as an assistant. It will display the components of a map but it is only a start. Now I will continue to work on the API to give it the ability to build a complete map.
Another interesting idea simple to develop with the wardleyToGo SDK is the possibility for ChatGPT to anaylse a map saved on onlineardleymaps.com.
For example I could ask ChatGPT:
what do you think of this map: https://onlinewardleymaps.com/#UtzyxpPElI1ZUjABuH
Then it will send the request to the plugin that:
- will fetch the OWM representation
- build the intermediate representation (a
wardleyToGo.Map) - extract some meaning (for example: this component is in stage blabla)
give the result back.
I am happy that I designed wardleyToGo as an SDK, now, to me, sky is the limit !
References:
- the
wardkeyToGoSDK - the code of the plugin so far
- another article about wardleyToGo