Evolving the Game: A clientless streaming tool for reMarkable 2
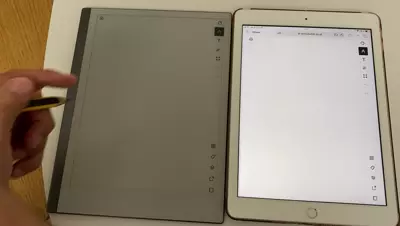
In 2021, I developed a tool to stream the content of my reMarkable. (and I also blogged about it in a previous post). Given that I was predominantly working from home, this tool was very useful, allowing me to sketch elements during conference calls.
One of the primary benefits of this tool was its ability to stream content directly into a web browser tab. This feature was particularly useful because it meant I could exclusively share this tab during video calls, ensuring focus on the content I intended to present.
At its core, the tool consisted of two main components:
- A server running on the device, responsible for capturing the raw image and transmitting it to the laptop.
- A service on the laptop, which fetched the raw image from the server and processed it into a format suitable for browser viewing (I produced an MJPEG stream for this).
Being the product manager of my own tools offered a unique perspective. One piece of feedback I provided from my experience as a user was the slightly cumbersome nature of the tool’s on-the-fly activation. The challenge arose from the necessity of a local service. During video calls, this meant some preparatory steps to initiate the local service, adding an additional layer of complexity to the process.
Recognizing this pain point, my goal became clear: eliminate the need for the local service. This article delves into the revamped implementation of the streaming tool, which now boasts a more user-friendly design and improved performances.
Make it work: The Evolution from Old to New
The code running on the device must have a low footprint. One way to ensure it remains lightweight is by eliminating any heavy computation on the device. The sole function of the code running on the server is to grab the raw picture from the memory and expose it over the network. This led to a three-tier design: server/client/renderer.
Ubiquitous language:
In this article:
- The server refers to the code running on the reMarkable (the device). Its main purpose is to expose the raw image of the current display on the reMarkable.
- The client is responsible for fetching the raw image from the server and performing additional processes to convert it into a usable format.
- The renderer accepts the output from the client and displays it on a PC screen.
+---------------------------+        +-----------------------------------+
|          reMarkable       |        |               Laptop              |
|                           |        |                                   |
|       +-------+           |  gRPC  |       +-------+                   |
|       |Server |<--------- |<------>|------>|Client |                   |
|       +-------+           | Fetch  |       +-------+                   |
|                           | Stream |           |                       |
|                           |        |     HTTP MJPEG stream             |
|                           |        |           |                       |
|                           |        |           v                       |
|                           |        |       +--------+                  |
|                           |        |       |Renderer|                  |
|                           |        |       +--------+                  |
|                           |        |      (Browser/VLC)                |
+---------------------------+        +-----------------------------------+
To minimize CPU usage, the server extracts the picture only when the client is connected. This functionality was achieved through gRPC communication.
The server can thus operate as a daemon on the reMarkable, awaiting an RPC call from the client. To initiate streaming, I simply needed to activate the client. The client retrieves the image in a loop, and each image is encoded in JPEG before being added to an MJPEG stream. This stream is then made available as an HTTP service by the client.
The renderer is any software capable of reading the MJPEG stream via HTTP, such as VLC or a web browser.
One challenge with this setup is that it necessitates a specific network topology and configuration. The client must not only be aware of the reMarkable’s address but also possess the necessary privileges to establish a server. Additionally, the renderer must be familiar with the client’s IP address.
While this wasn’t an issue in my personal setup, complications arose post-pandemic when I returned to in-person presentations. I realized the need for a more straightforward solution. My ultimate aim became the ability to simply input the reMarkable’s address into any browser and instantly access the stream.
New Architecture
To achieve the objective, the solution involves eliminating the client and instead establishing an HTTP server within the server component. The client should be implemented in a format that’s interpretable by a browser, such as Javascript or WASM.
My initial approach was to compile the client into WASM. This seemed promising as it would let me leverage my expertise in Go development. However, I encountered several limitations that would have necessitated substantial modifications.
Consequently, I opted to develop a second version of the tool, with the client written in Javascript.
Side note: At this juncture, I confronted another challenge. While I possess a broad understanding of Javascript’s functionality and browser rendering processes (what we might term “architectural skills”), I felt less confident in my hands-on JS development abilities. I turned to my digital assistant, ChatGPT, for guidance. With my direction on the desired solution, it provided the necessary code fragments and explanations to bring my vision to life. I was the developer, he was the coder.
Validation of the “canvas” renderer
Initially, it was imperative to move away from the MJPEG stream, especially since my operations were now closely aligned with the renderer, and Javascript possesses the required primitives for image manipulation.
In the browser, the conventional method for handling images is via the canvas element.
My preliminary task was to validate that I could retrieve a raw image from the server and showcase it within a canvas.
I achieved this by accessing the backbone of the canvas that represents the pixel map data in RGBA format and adjusting the pixels based on their values in the raw image from the reMarkable:
<canvas id="fixedCanvas" width="1872" height="1404" class="hidden"></canvas>
<script>
    // Use the fixed-size canvas context to draw on the canvas
    var fixedCanvas = document.getElementById("fixedCanvas");
    var fixedContext = fixedCanvas.getContext("2d");
    function processBinaryData(data) {

        // Assuming each pixel is represented by 4 bytes (RGBA)
        var pixels = new Uint8Array(data);
        // Create an ImageData object with the byte array length
        var imageData = fixedContext.createImageData(fixedCanvas.width, fixedCanvas.height);
        // Assign the byte array values to the ImageData data property
        for (var i = 0; i < pixels.length; i++) {
            imageData.data[i*4] = pixels[i];
            imageData.data[i*4+1] = pixels[i];
            imageData.data[i*4+2] = pixels[i];
            imageData.data[i*4+3] = 255;
        }

        // Display the ImageData on the canvas
        fixedContext.putImageData(imageData, 0, 0);
    }
There’s also a requirement to adjust the image for responsiveness according to the browser’s size, as well as for image rotation and potential colorization.
To achieve this, I maintain the fixedCanvas in a hidden state and transfer its contents to another canvas using the drawImage method.
The dimensions of the destination canvas (its width and height) undergo adjustments if a resize event is detected within the browser window.
var resizableCanvas = document.getElementById("canvas");
var resizableContext = resizableCanvas.getContext("2d");
function copyCanvasContent() {
    resizableContext.drawImage(fixedCanvas, 0, 0, resizableCanvas.width, resizableCanvas.height);
}

// JavaScript code for working with the canvas element
function resizeCanvas() {
    var canvas = document.getElementById("canvas");
    var container = document.getElementById("container");

    var aspectRatio = 1872 / 1404;

    var containerWidth = container.offsetWidth;
    var containerHeight = container.offsetHeight;

    var containerAspectRatio = containerWidth / containerHeight;

    if (containerAspectRatio > aspectRatio) {
        canvas.style.width = containerHeight * aspectRatio + "px";
        canvas.style.height = containerHeight + "px";
    } else {
        canvas.style.width = containerWidth + "px";
        canvas.style.height = containerWidth / aspectRatio + "px";
    }

    // Use the canvas context to draw on the canvas
    copyCanvasContent();
}

// Resize the canvas whenever the window is resized
window.addEventListener("resize", resizeCanvas);
Basic Drop-In Replacement
With the renderer in place, my next step was to implement a lightweight JS client as a substitute. While gRPC offers robust functionality, it’s not typically considered the gold standard in web development.
Thus, for communication and encapsulation, I gravitated towards the WebSocket protocol. It was straightforward enough to be incorporated server-side, serving as a seamless drop-in replacement for the RPC server.
Messages delivered via this protocol carry the raw image. The client remains on standby for these messages, and with each incoming message, the canvas content is updated, effectively emulating a streaming process.
One notable advantage of this approach is the enhanced control over server-side load. Extracting the raw image demands both memory and CPU resources on the device. By regulating the message emission frequency, I can efficiently manage device load.
Make it Right: Changing the Streaming Architecture
The Websockets-based solution was operational, but it introduced challenges, particularly on iOS. Furthermore, the Websocket implementation server-side introduced a certain overhead, which I lacked control over. As a result, I pursued a different strategy to eliminate the use of websockets.
One might wonder: Why even need an encapsulation method? Can’t I just directly send the data stream?
Indeed, simplicity is complex.
Raising this question of simplicity made me switch to a bare-bones approach: transmitting raw images over the network without any additional encapsulation.
This was feasible because I was privy to the image size, which remains constant due to the resolution of the reMarkable.
I crafted a Go endpoint that continuously wrote images to the wire (specifically to the http.ResponseWriter), using a basic Write method.
func (h *StreamHandler) ServeHTTP(w http.ResponseWriter, r *http.Request) {
    //ctx, cancel := context.WithTimeout(r.Context(), 1*time.Hour)
    ctx, cancel := context.WithTimeout(r.Context(), 1*time.Hour)
    defer cancel()
    tick := time.NewTicker(rate * time.Millisecond),
    defer tick.Stop()

    imageData := imagePool.Get().([]uint8)
    defer imagePool.Put(imageData) // Return the slice to the pool when done
    for {
        select {
        case <-ctx.Done():
            return
        case <-tick.C:
            // Read the content of the image
            _, err := file.ReadAt(imageData, h.pointerAddr)
            if err != nil {
                log.Fatal(err)
            }
            // Write the image
            w.Write(imageData)
        }
    }
}
From the client’s perspective, a fetch method captures the data and feed the backbone of the canvas.
// Create a new ReadableStream instance from a fetch request
const response = await fetch('/stream');
const stream = response.body;

// Create a reader for the ReadableStream
const reader = stream.getReader();
// Create an ImageData object with the byte array length
var imageData = fixedContext.createImageData(fixedCanvas.width, fixedCanvas.height);

// Define a function to process the chunks of data as they arrive
const processData = async ({ done, value }) => {
        // Process the received data chunk
        // Assuming each pixel is represented by 4 bytes (RGBA)
        var uint8Array = new Uint8Array(value);
        for (let i = 0; i < uint8Array.length; i++) {
                // process data to feed the backbone of the canvas (imageData)
                // ...
                copyCanvasContent(); // copy the hidden canvas to the responsive one
            }
        }

        // Read the next chunk
        const nextChunk = await reader.read();
        processData(nextChunk);
};

// Start reading the initial chunk of data
const initialChunk = await reader.read();
processData(initialChunk);
Make it Fast: Network Consumption Optimizations
With a robust architecture in place, it’s time to fine-tune the tool’s efficiency. One significant challenge arises from the size of the raw picture—approximately 2.5Mb (with a resolution of 1872x1404 for the reMarkable 2). This volume of data needs to be transferred with each frame.
Packing the Values
The reMarkable showcases “16” distinct colors. Since the release of FW 3.3, this color palette can be represented as an array of uint4 instead of uint8, as discussed in issue 36. Adopting this representation can yield a 50% reduction in data volume.
However, both Go and JavaScript lack native support for the uint4 type.
A viable workaround involves storing data for two pixels within a single byte (uint8). This approach necessitates the creation of two dedicated functions—one for packing in Go and another for unpacking in JavaScript.
Go Packing Function:
// Packing algorithm to encode two uint4 values into a single uint8
// Assumes arguments as uint4 and omits verification for efficiency
func pack(value1, value2 uint8) uint8 {
        // Shift the first value by 4 bits and combine it with the second using a bitwise OR
        encodedValue := (value1 << 4) | value2;
        return encodedValue;
}
JavaScript Unpacking Function:
// Unpack the uint4 values
function unpackValues(packedValue) {
        // Extract the upper 4 bits to obtain the first value
        const value1 = (packedValue >> 4) & 0x0F;

        // Isolate the lower 4 bits to get the second value
        const value2 = packedValue & 0x0F;

        return [value1, value2];
}
RLE Compression for Enhanced Efficiency
Having achieved a reduction of 1.2Mb per frame through our packing technique, the next step is to further minimize data transfer. To accomplish this, we can turn to more sophisticated compression algorithms without straining the reMarkable’s CPU or complicating our implementation.
Upon consulting with peers, the Run Length Encoding (RLE) algorithm emerged as a recommended option due to its simplicity and effectiveness. Without delving into a detailed explanation, the principle behind RLE is relatively straightforward: it involves tallying the consecutive occurrences of the same pixel value and subsequently transmitting this count alongside the pixel value itself.
For instance, let’s consider a sample sequence:
0 0 0 0 0 0 1 1 1 0 0 0 0Using RLE, this sequence transforms to:
6 0 3 1 4 0Implementing RLE is quite direct. However, a challenge arises when considering the potential count values, which can soar up to 1872*1404. Representing such large numbers would necessitate a datatype like uint64. This poses a risk: in certain scenarios, the “compressed” sequence could end up surpassing the uncompressed picture in size.
To avert this, I opted to cap the count length at 15. This choice paves the way to represent both the count and the pixel value within a single byte, striking a balance between simplicity and efficiency.
An added advantage of our RLE implementation in Go, which mimics an io.Writer, is its reusability.
If a situation calls for it, I can apply the RLE compression twice, though current circumstances haven’t demanded such a measure.
So far, the transfer is about 200Kb in average.
Sending Pictures Only Upon Modification
The final optimization is to transmit new frames solely when there’s a change. Determining whether a picture has been altered would typically require computing a checksum, which can be CPU-intensive.
However, the reMarkable device operates on a Linux system.
Thus, any screen interaction, whether by pen or touch, gets routed through /dev/input/event*.
I’ve introduced a goroutine that monitors these events and dispatches the pictures as necessary.
As a result, in the absence of any events, the CPU usage drops to zero, even if a client remains connected. During writing operations, the CPU usage hovers around 10% — a level I consider efficient.
End Notes
This application is based on a hack. The core challenge is about effectively decoupling the interface, which fetches the image, from the client/renderer.
In the prior implementation, there was a complete decoupling facilitated by the protobuf definition between the client and the server. Historically, when reMarkable introduced its 3.3 firmware, it disrupted the tool, as highlighted by issue 36 on GitHub. However, the necessary adjustments fixing this issue impacted only the client component.
It seems firmware version 3.6 might also usher in a breaking change, as indicated by issue 58. I anticipate that addressing this will entail broader modifications. On the bright side, the self-contained nature of the application (with the client integrated into the server) should streamline updates on the device.
The realm of IT is riddled with trade-offs; there’s no universal solution. This dynamism and adaptability are what infuse excitement into the domain.
The application and its source code are accessible on github.com/owulveryck/goMarkableStream.