Chrome, the eye of the cloud - Computer vision with deep learning and only 2Gb of RAM
TL;DR: Thank you for passing by. This article is, as usual, geek oriented. However, if you are not a geek, and/or you are in a hurry, you can jump to the conclusion: Any real application?
During the month of may, I have had the chance to attend to the Google Next event in London and the dotAI in Paris. In both conferences I learned a lot about machine learning.
What those great speakers have taught me is that you should not reinvent the wheel in AI. Actually a lot of research is done and there are very good implementation of the latest efficient algorithm.
The tool that every engineer that wants to try AI must know is tensorflow. Tensorflow is a generic framework that has been developed by Google’s Machine Intelligence research organization. The tool has been open-sourced last year and has reached the v1.0 earlier this year.
So what makes tensorflow so great?
Bindings
First of all, it has bindings so it can be used within various programming languages such as:
- python
- c++
- java
- go
However, to be honest, mainly python and c++ are described in the documentation. And to be even more honest I think that python is the language that you should use to prototype applications.
ML and neuron network examples
Tensorflow is easy to use for machine learning, and a lot of deep-learning implementation are available. Actually it is very easy to download a trained model and use it to recognize some pictures for example.
Built-in computation at scale
Tensorflow’s model has a built-in way to perform distributed computation. It is really important as machine learning is usually a very intensive task in term of computation.
GCP’s ML engine
Tensorflow is the engine used by Google for their service called ML engine. That means that you can write your function locally and run them serverless on the cloud. You only pay for what you have effectively consumed. That means for example that you can train a neuron network on GCP (so you don’t need GPU. TPU, or whatever computing power) and transfer your model locally.
For example, this is how the mobile app “google translate” works. A pre-trained model is downloaded on your phone, and the live translation is done locally.

Note Other ML services from GCP such as cloud vision, translate, or image search, are “just” API that query a neuron network with a model trained by google.
So What?
I want to play with image recognition. Actually I already did a test with AWS’s rekognition service (See this post). However, the problems were:
- I relied on a low-level webcam implementation. Therefore, the code was not portable;
- I had no preview of what my computer was looking at;
- I could not execute it on any mobile app for a demo;
As I am using a Chromebook for a while, I found a solution: Using a Javascript API and the Chrome browser to access the camera. Then, the pictures can be transfered to a backend via a websocket. The backend would do the ML and reply with whatever information via the websocket. I can then display the result or even use the voice api of Chrome to tell the result loud.
Chrome as the eye of the computer
The idea is to get a video stream and grab pictures from this stream in order to activate a neural network.
I will present different objects in front of my webcam, and their name will be displayed on the screen.
The architecture is client server: The Chrome is the eye of my bot, it communicates with the brain (a webservice in go that is running a pre-trained tensorflow neural network) via a websocket.
The rest of this paragraph is geek/javascript, if you’re not interested you can jump to the next paragraph about the brain implementation called Cortical
getUserMedia
I am using the Web API MediaDevices.getUserMedia() to open the webcam and get the stream.
This API is compatible with chrome on desktop and mobile on Android phone (but not on iOS). This means that I will be able to use a mobile phone as an “eye” of my bot.
See the compatibility matrix here
Here is the code to get access to the camera and display the video stream:
html
<body>
  <video autoplay id="webcam"></video>
</body>
Javascript
// use MediaDevices API
// docs: https://developer.mozilla.org/en-US/docs/Web/API/MediaDevices/getUserMedia
if (navigator.mediaDevices) {
    // access the web cam
    navigator.mediaDevices.getUserMedia({video: true})
      // permission granted:
      .then(function(stream) {
          video.src = window.URL.createObjectURL(stream);
      })
      // permission denied:
      .catch(function(error) {
          document.body.textContent = 'Could not access the camera. Error: ' + error.name;
      });
}
Websockets
According to Wikipedia’s definition, Websocket is a computer communications protocol, providing full-duplex communication channels over a single TCP connection. The full duplex mode is important in my architecture.
Let me explain why with a simple use case:
Imagine that your eye captures a scene and sends it to the brain for analysis. In a classic RESTfull architecture, the browser (the eye) would perform a POST request. The brain would reply with a process ID, and the eye would poll the endpoint every x seconds to get the processing status.
This can be tedious in case of multiple stimuli.
Thanks to the websocket, the server can send the query, and the server will send an event back once the processing is done. Of course this is stateless in a sort, as the query is lost once the browser is closed.
Another use case would be to get a stimulus from another “sense”. For example, imagine that you want to “warn” the end user that he has been mentioned in a tweet. The brain can be in charge of polling twitter, and it would send a message through the websocket in case of event.
Connecting to the websocket
A websocket URI is prefixed by ws or wss if the communication is encrypted (aka https).
This code allows a connection through ws(s).
var ws
// Connecting the websocket
var loc = window.location, new_uri;
if (loc.protocol === "https:") {
  new_uri = "wss:";
} else {
  new_uri = "ws:";
}
new_uri += "//" + loc.host + "/ws";
ws = new WebSocket(new_uri);
Messages
Web socket communication is message oriented. A message can be sent simply by calling the function ws.send(message). Websockets are supporting texts and binary messages.
But for this test only text messages will be used (images will be encoded in base64).
The browser implementation of a websocket in javascript is event based.
When the server sends a message, an interruption is fired and the ws.onmessage call is triggered.
This code will display the message received on the console:
ws.onmessage = function(event) {
  console.log("Received:" + event.data);
};
Sending pictures to the websocket: actually seeing
I didn’t find a way to send the video stream to the brain via the websocket. Therefore, I will do what everybody does: create a canvas and “take” a picture from the video:
The method toDataURL() will take care of encoding the picture in a well-known format (png or jpeg).
function takeSnapshot() {
  var context;
  var width = video.offsetWidth
  , height = video.offsetHeight;

  canvas = canvas || document.createElement('canvas');
  canvas.width = width;
  canvas.height = height;

  context = canvas.getContext('2d');
  context.drawImage(video, 0, 0, width, height);

  var dataURI = canvas.toDataURL('image/jpeg')
  //...
};
To make the processing in the brain easier, I will serialize the video into a json object and sending it via the websocket:
var message = {"dataURI":{}};
message.dataURI.content = dataURI.split(',')[1];
message.dataURI.contentType = dataURI.split(',')[0].split(':')[1].split(';')[0]
var json = JSON.stringify(message);
ws.send(json);
Bonus: ear and voice
It is relatively easy to make chrome speak out loud the message received. This snippet will speak out loud the message Received:
function talk(message) {
  var utterance = new SpeechSynthesisUtterance(message);
  window.speechSynthesis.speak(utterance);
}
Therefore, simply adding a call to this function in the “onmessage” event of the websocket will trigger the voice of Chrome.
Listening is a bit trickier. It is done by a call to the webkitSpeechRecognition(); method. This blog post explains in detail how this works.
The call is also event based. What’s important is that, in chrome, by default, it will use an API call to the Google’s engine. Therefore the recognition won’t work offline.
When the language processing is done by chrome, five potential sentences are stored in a json array. The following snippet will take the most relevant one and send it to the brain via the websocket:
recognition.onresult = function(event) {
  for (var i = event.resultIndex; i < event.results.length; ++i) {
    if (event.results[i].isFinal) {
      final_transcript += event.results[i][0].transcript;
      ws.send(final_transcript);
    }
  }
};
Now that we have set up the senses, let’s make a “brain”
The brain: Cortical

Now, let me explain what is, according to me, the most interesting part of this post. By now, all that I have done is a bit of javascript to grab a picture. This is not a big deal, and there is no machine learning yet (besides the speech recognition built-in in chrome). What I need now is to actually process the messages so the computer can tell what it sees.
For this purpose I have developed a message dispatcher. This dispatcher, called Cortical is available on github
Here is an extract from the README of the project:
What is Cortical?
Cortical is a go framework middleware piece of code that acts as a message dispatcher. The messages are transmitted in full duplex over a websocket.
Cortical is therefore a very convenient way to distribute messages to “processing units” (other go functions) and to get the responses back in a concurrent and asynchronous way.
The “processing units” are called Cortexes and do not need to be aware of any web mechanism.
So far, so good, I can simply create a handler to receive the messages sent by the chrome browser in go:
brain := &cortical.Cortical{
    Upgrader: websocket.Upgrader{},
    Cortexes:  []cortical.Cortex{
                    &sampleTensorflowCortex{}, // cortex?
               },
}
http.HandleFunc("/ws", brain.ServeWS)
log.Fatal(http.ListenAndServe(":8080", nil))Note: Concurrency and asynchronicity are really built in Cortical, this is what makes this code so helpful actually.
Cortexes
Cortexes are processing units. That is the place where messages are analyzed and where the ML magic happens.
From the readme, I quote:
A cortex is any go code that provides two functions:
- A “send” function that returns a channel of
[]byte. The content of the channel is sent to the websocket once available (cfGetInfoFromCortexFunc) - A “receive” method that take a pointer of
[]byte. This function is called each time a message is received (cfSendInfoToCortex)
A cortex object must therefore be compatible with the cortical.Cortex interface:
Ok, let’s build Cortexes!
A tensorflow cortex runnig locally
The tensorflow go package is a binding to the libtensorflow.so. It has a very nice example described in the godoc here.
This example is using a pre-trained inception model (http://arxiv.org/abs/1512.00567).
The program starts by downloading the pre-trained model, creates a graph, and try to guess labels on a given image.
I will simply add the expected interface to transform this example into a Cortex compatible with my previous declaration (some error check and some code has been omited for clarity):
type sampleTensorflowCortex struct{}

func (t *sampleTensorflowCortex) NewCortex(ctx context.Context) (cortical.GetInfoFromCortexFunc, cortical.SendInfoToCortex) {
        c := make(chan []byte)
        class := &classifier{
                c: c,
        }
        return class.Send, class.Receive
}

type classifier struct {
        c chan []byte
}

func (t *classifier) Receive(ctx context.Context, b *[]byte) {
        var m message
        // omited for brievety
        tensor, err := makeTensorFromImage(m.DataURI.Content)
        output, err := session.Run(
                map[tf.Output]*tf.Tensor{
                        graph.Operation("input").Output(0): tensor,
                },
                []tf.Output{ graph.Operation("output").Output(0),
                }, nil)
        probabilities := output[0].Value().([][]float32)[0]
        label := printBestLabel(probabilities, labelsfile)
        t.c <- []byte(fmt.Sprintf("%v (%2.0f%%)", label.Label, label.Probability*100.0))
}

func (t *classifier) Send(ctx context.Context) chan []byte {
      return t.c
}
Demo
This demo has been made with my Chromebook that has only 2 Gb or RAM. The tensorflow library is compiled without any optimization. It works!
The code is available on GitHub.
In the cloud with AWS
Now that I have seen that it works on my Chromebook, I can maybe use the cloud API to recognize some faces for example. Let’s try with AWS’ rekognition service.
I will use the face compare API to check whether the person in front of the webcam is me. I will provide a sample picture of me to the cortex.
I took the sample picture at work, to make the task a little bit trickier for the engine because the environment will not match what it will see.
I won’t dig into the code that can be found in the rekognition processor source.
And does it work?
Cool!
Any real application?
This is really fun and exciting.Now I will be able to code a memory cortex to fetch a training set. Then I will play with tensorflow. And do not think that everything has already been done, this area is full of surprises to come (This is the Moravec’s paradox).
However, on top of that, we can imagine a lot of application. Actually, this service is working out-of-the box on Android (and it will on iOS as soon as Apple supports the getUSerMedia interface). I imagine a simple web app (no need for an APK), that would warn you when it sees someone he knows.
I also imagine a web gallery, and the webcam would watch your reaction in front of different items and then tells you which one has been your favorite.
Indeed, there may be a lot of great application for e-commerce.
You can turn your laptop into a CCTV system so it can warn you when an unknown person is in the room. We would do a preprocessing to detect humans before actually sending the info to the cloud. That would be cheaper and a lot more efficient than the crappy CV implemented in the webcam.
And finally, combined with react.js, this can be used to do magic keynotes… But I will keep that for another story.
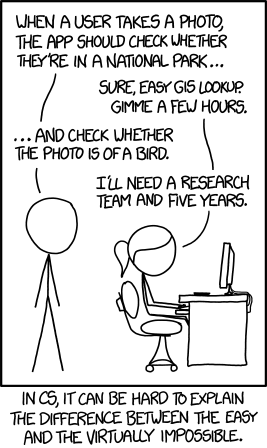
As a conclusion, I will put this XKCD of September 2014. It is only three years old, and yet, so many things have already changed: